Home Page Functionality
The Home page in PowerHub is the page that enables users to select, view, and edit Tools and their power POCs.
A tool is any equipment/device which is connected to one side of the power cable which is referred to as a POC in PowerHub. Users can search and select tools to view the associated POCs. Users can also create and add new POCs.
Home Page Functionality
There are multiple operations that a user can perform in the Home module as follows:
-
Site Selection
-
Entity/Tool Selection
-
Selected Tool Details
-
Schedule
-
Edit all POCs
-
Edit Tool
-
Pre-assignment completion tracker status
-
Delete POCs
-
Import POCs
-
Export POCs
-
Add POCs
-
Assign all POCs from flash scenario
-
Assign selected POCs from flash scenario
-
Choose flash scenario
1. Site Selection
Most users will have access to one or two sites. This dropdown allows the user to select the site location.
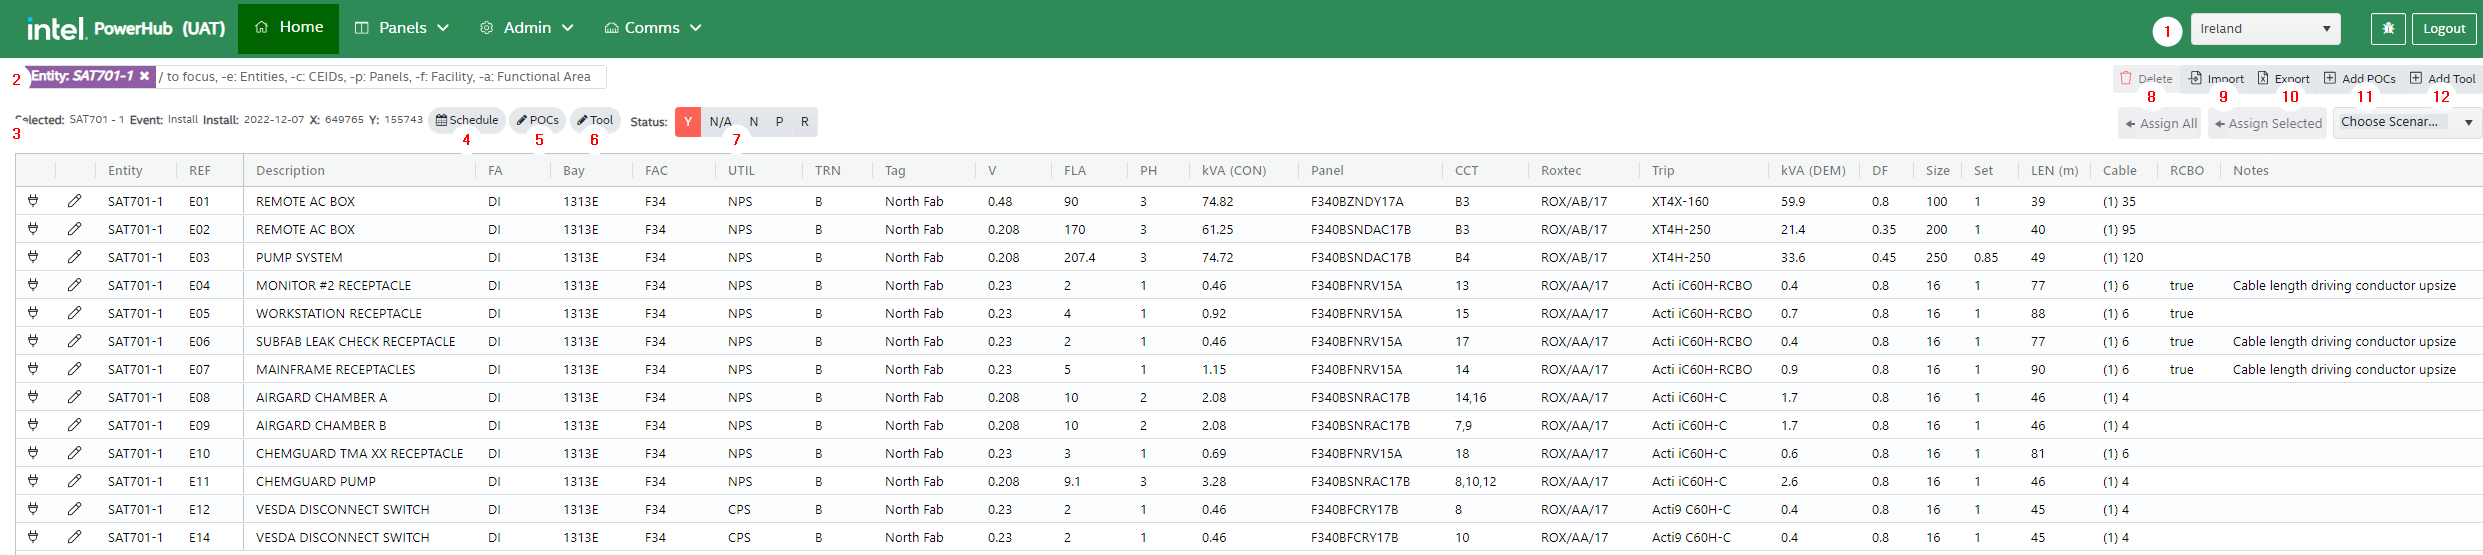
2. Entity/Tool Selection
To search for a tool start typing the entity code of the tool into the search bar and select it from the dropdown list that appears as you type. The user can click in the the main search field to display the list of search categories. Click "Entity" to search for an individual tool. You can also search for all tools with a specific CEID or Functional Area or in a facility. You can also search for all POCs that are connected to a panel. Just click on the required category and then type in the value you are searching for.
NOTE: If your tool does not appear in the list, then it has no Power POCs added to it yet. You will need to add POCs to your tool before it is searchable on the PowerHub home page.
3. Selected Entity Details
In the top-left corner just above the home grid, the details of the selected tool record get displayed including the Entity name, Event, Install & demo dates, and X & Y coordinates of the tool.
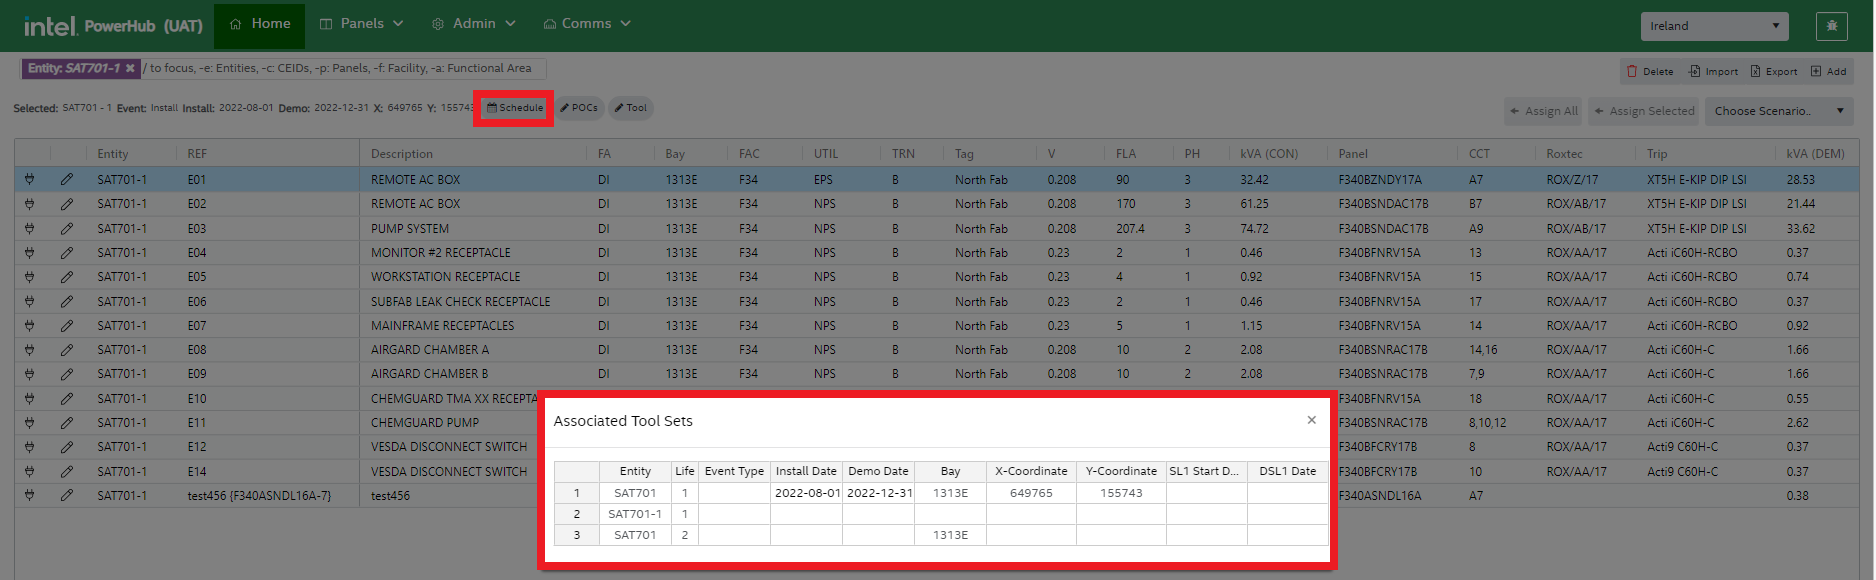
4. Schedule
This option allows the user to view the details of the associated tool sets including entity name, Event, Install & demolish dates, and X & Y coordinates of the tool.
5. POCs
Clicking this button will bring you to a page where you can add or edit power POCs on the tool. The POCs of the tool selected on the home page will be displayed in the grid.
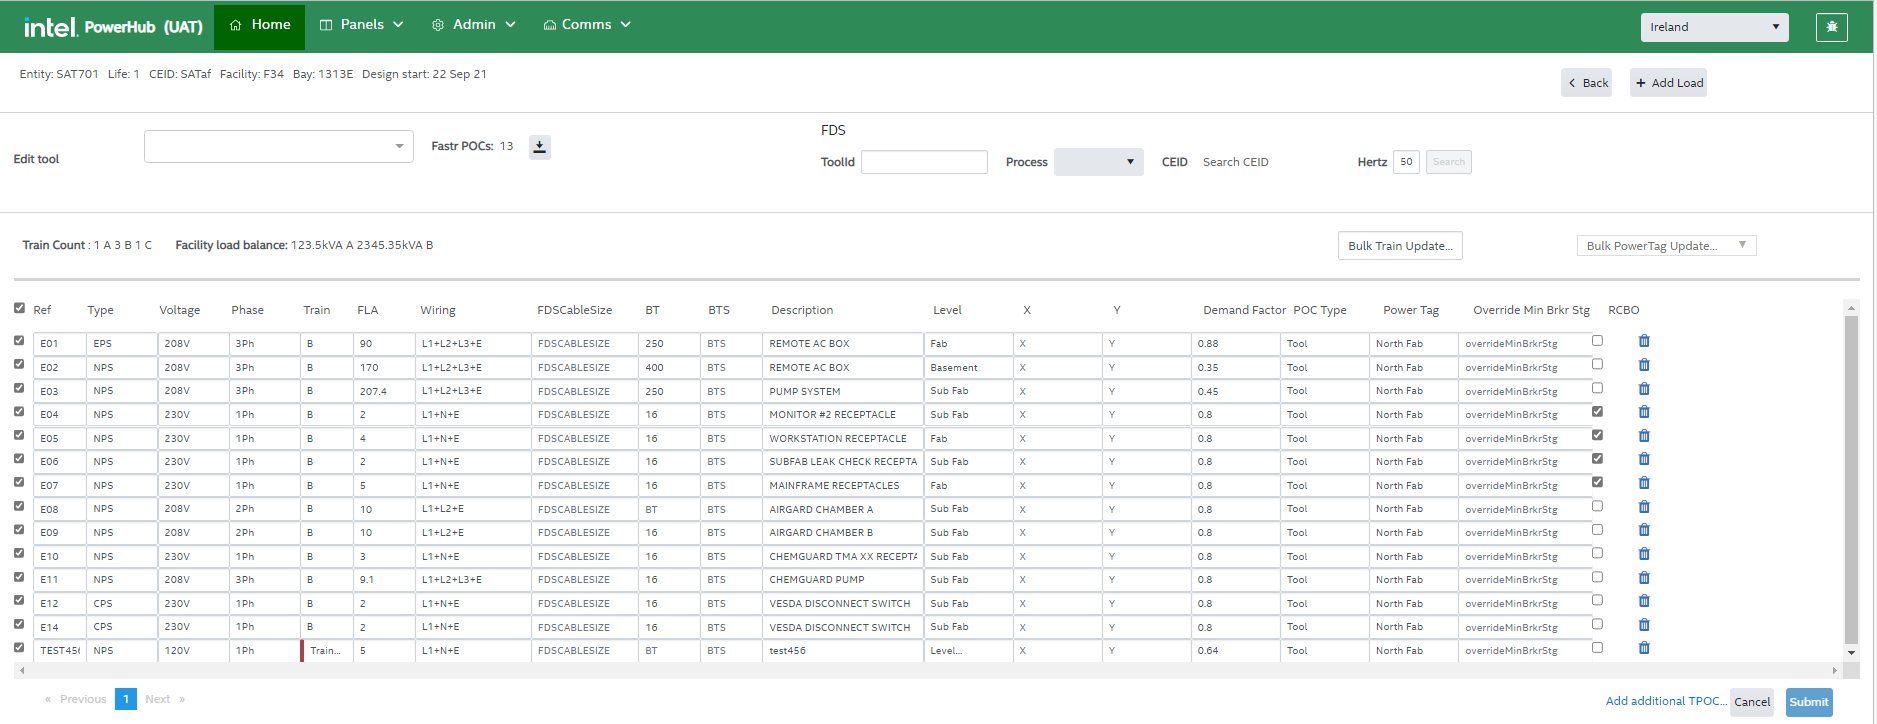
On this page you can:
Download FDS POCs from FaSTr
If the LSP tool has been built in FaSTr the down arrow will be enabled and the user can review differences between FDS and PowerHub and update PowerHub POCs accordingly.
Add additional POC
Another row will be added to the grid and the user can populate details of another POC to add to the tool.
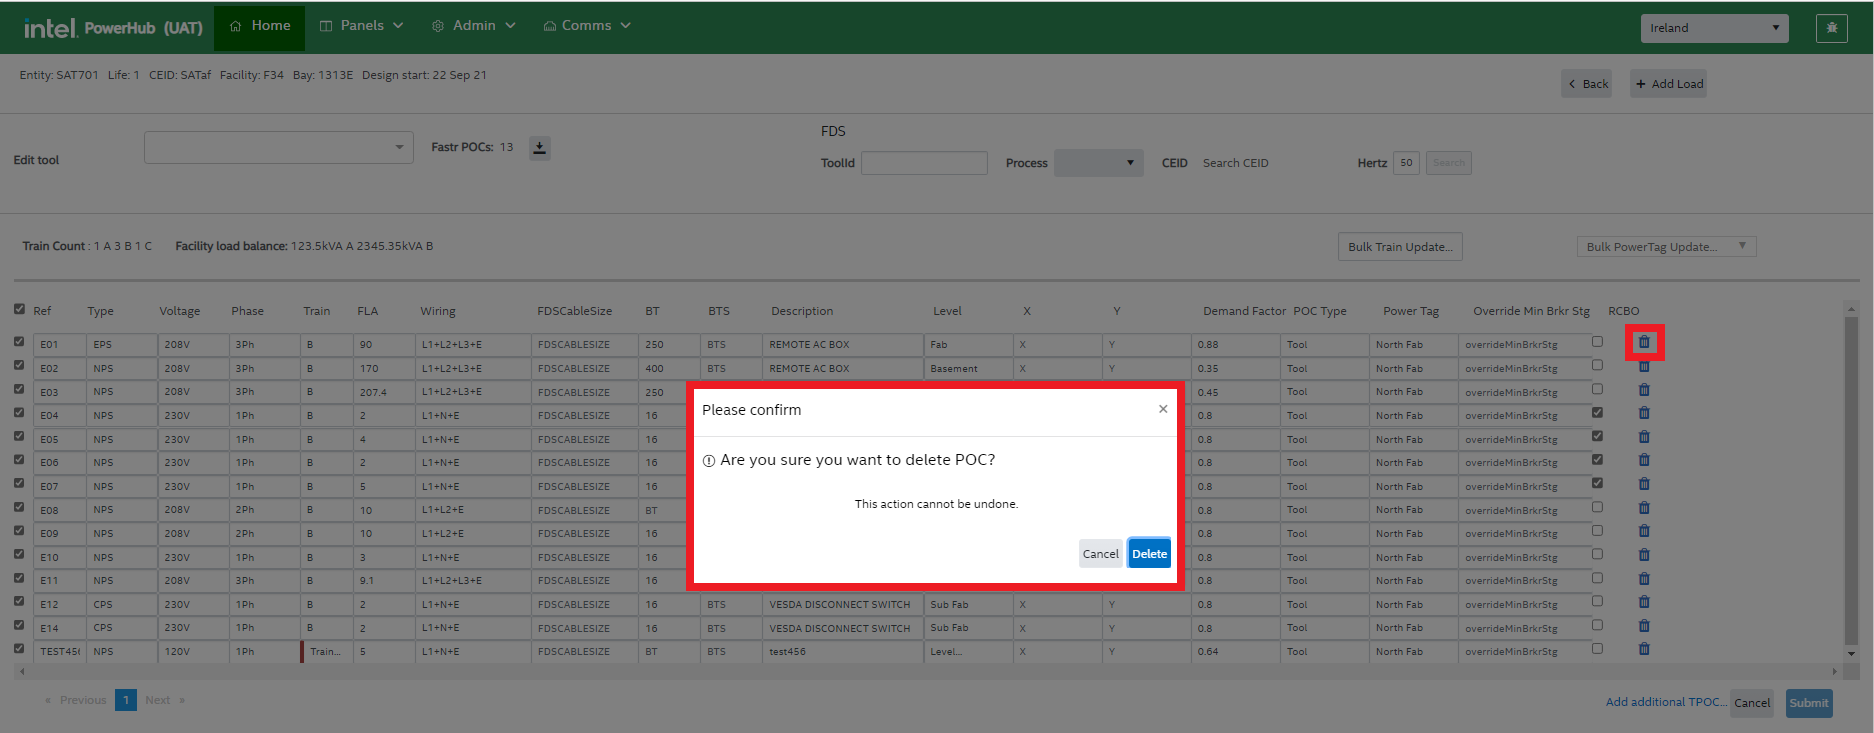
Delete POC
This icon enables the user to delete the corresponding POC.
Add Load/Add Tool
The ‘Add Load’ (or ‘Add Tool’ button on the home page) allows users to add a new tool or non-tool load to the system. See point 12 below for details.
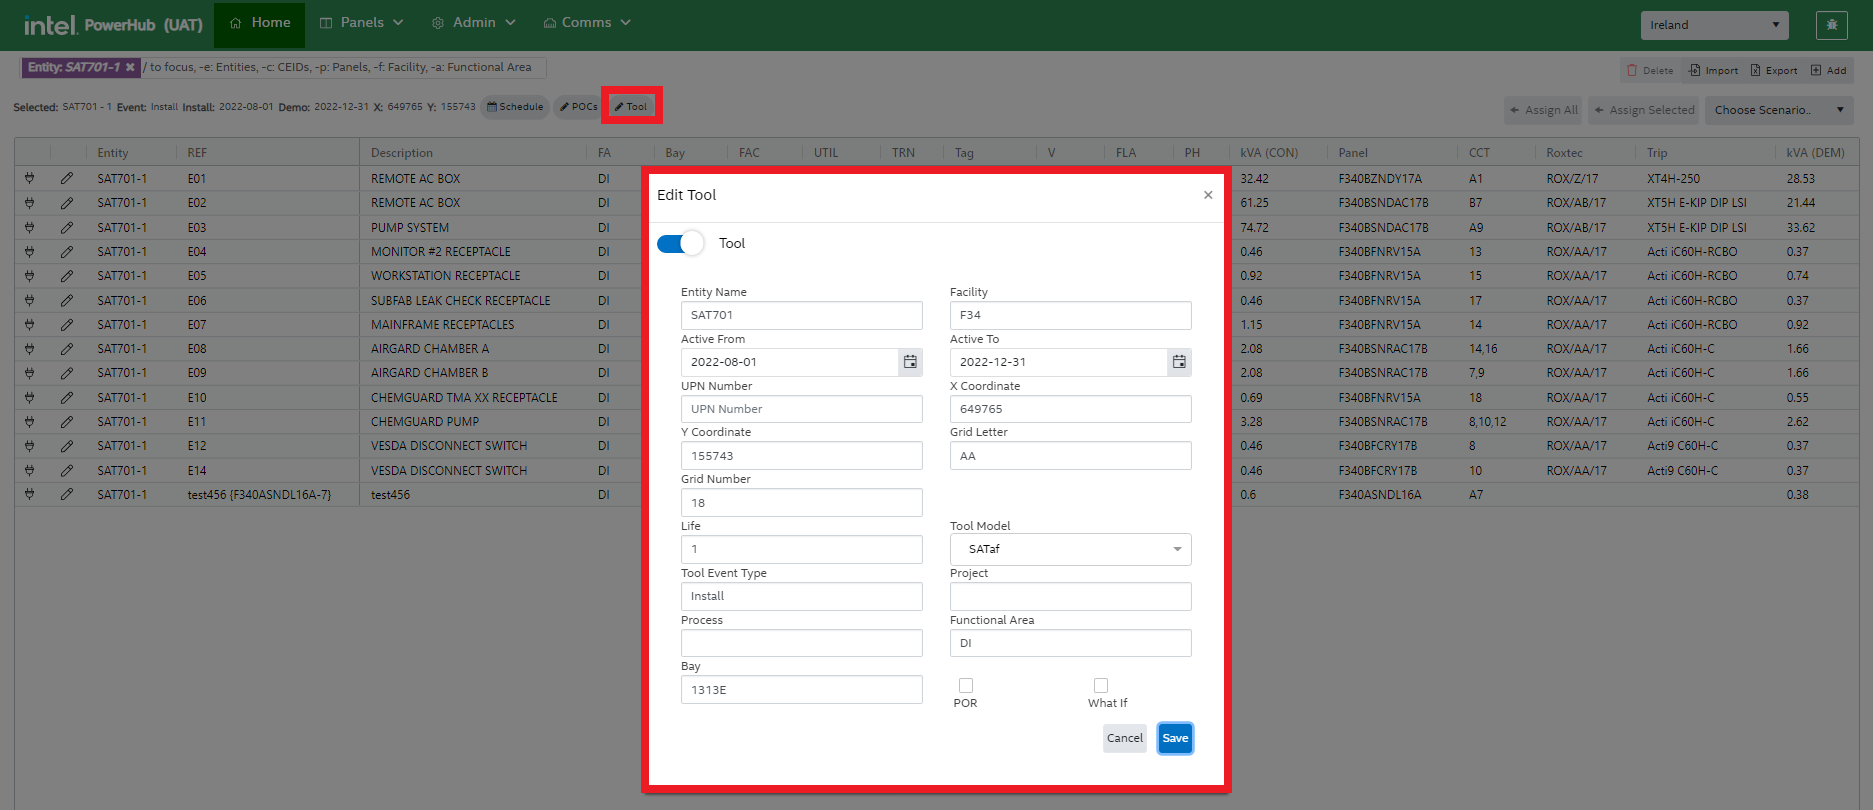
6. Edit Tool
This icon allows the user to edit the tool. Upon clicking this icon, an edit tool window pops up where the user can update the tool details such as entity name, facility, active to, active from, UPN, grid number, and more. Click Save to reflect the changes.
7. Status
This describes the pre-assignment completion status of the power discipline for the selected tool. The status can also be viewed and set in the PIP application. It can have the following values:
Y - All pre-assignment work for the power discipline is complete for this tool
N/A - The tool has no requirement for this discipline. Should never be the case for the Power discipline on a tool
N - A gating infrastructure issue needs to be resolved.
P - Waiting for non-gating information from stakeholders.
R - Needs review because of location, CEID or other changes.
In Ireland only, if the pre-assignment status of the Power discipline on a tool is not marked as Y or R, then users of the PIP application (A&E companies and trade companies) will not be able to see any details of the Power POCs.
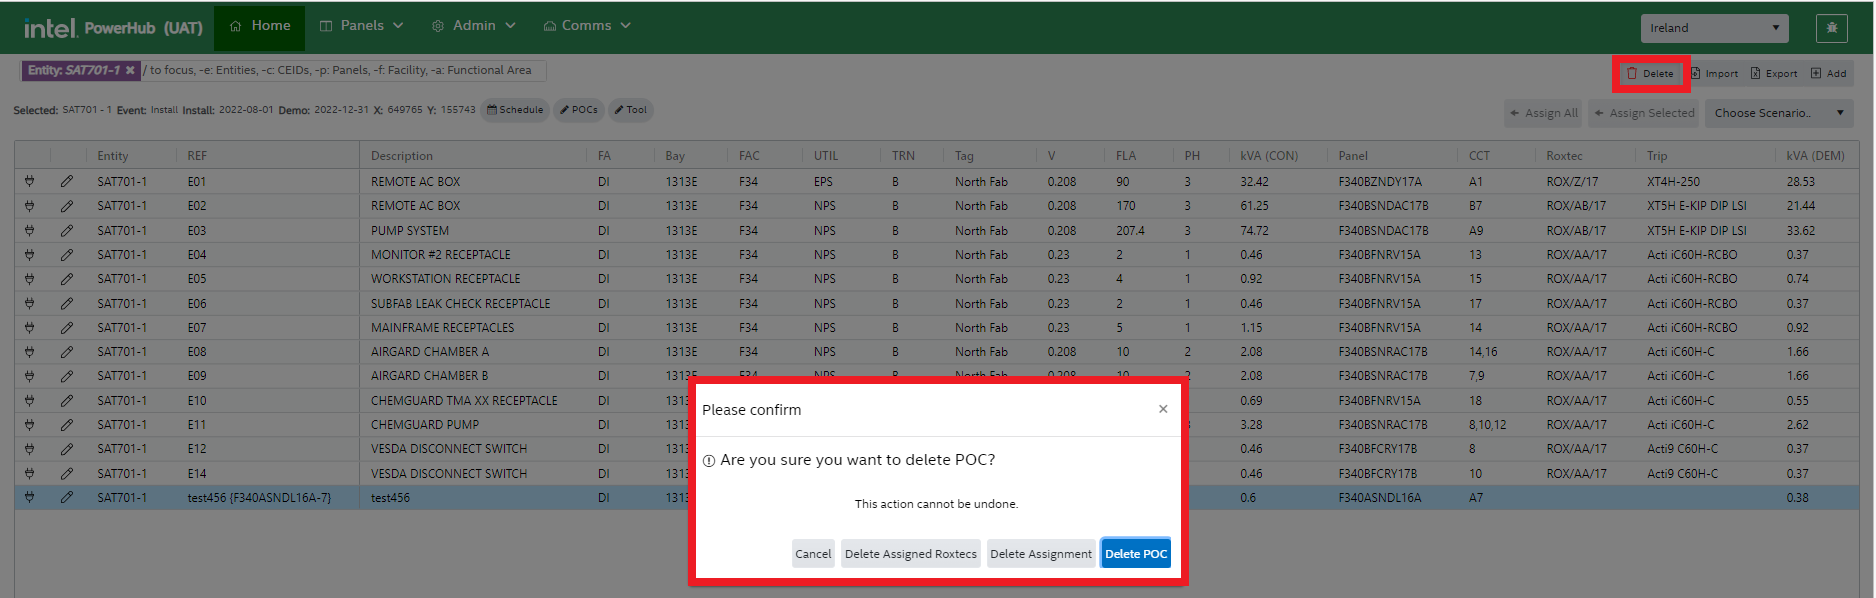
8. Delete
Selecting one or more POCs in the grid and pressing this button this button displays a dialog which allows the user to either:
-
Remove the assignment of POCs to panels, or
-
Remove the assignment of POCs from Roxtecs, or
-
Delete the selected POCs.
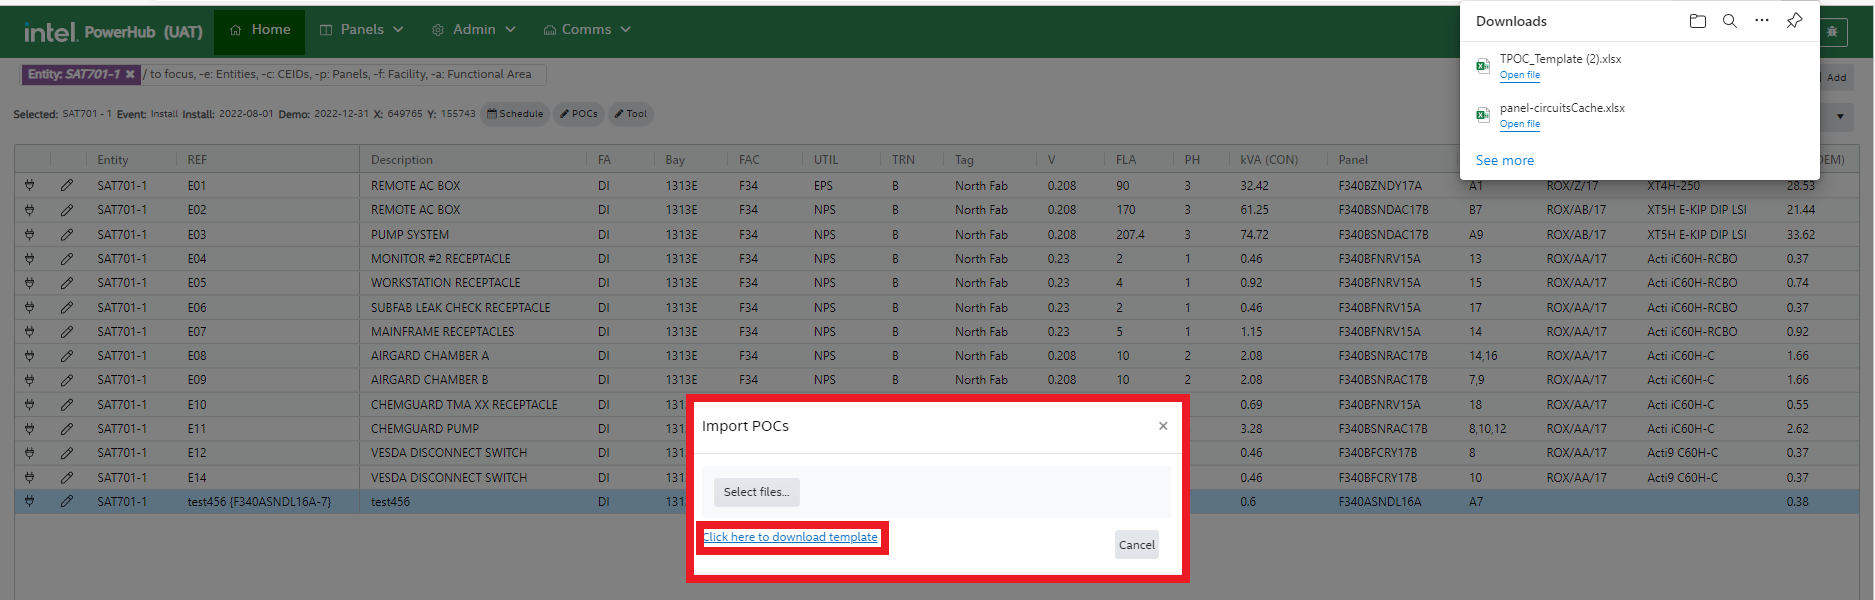
9. Import
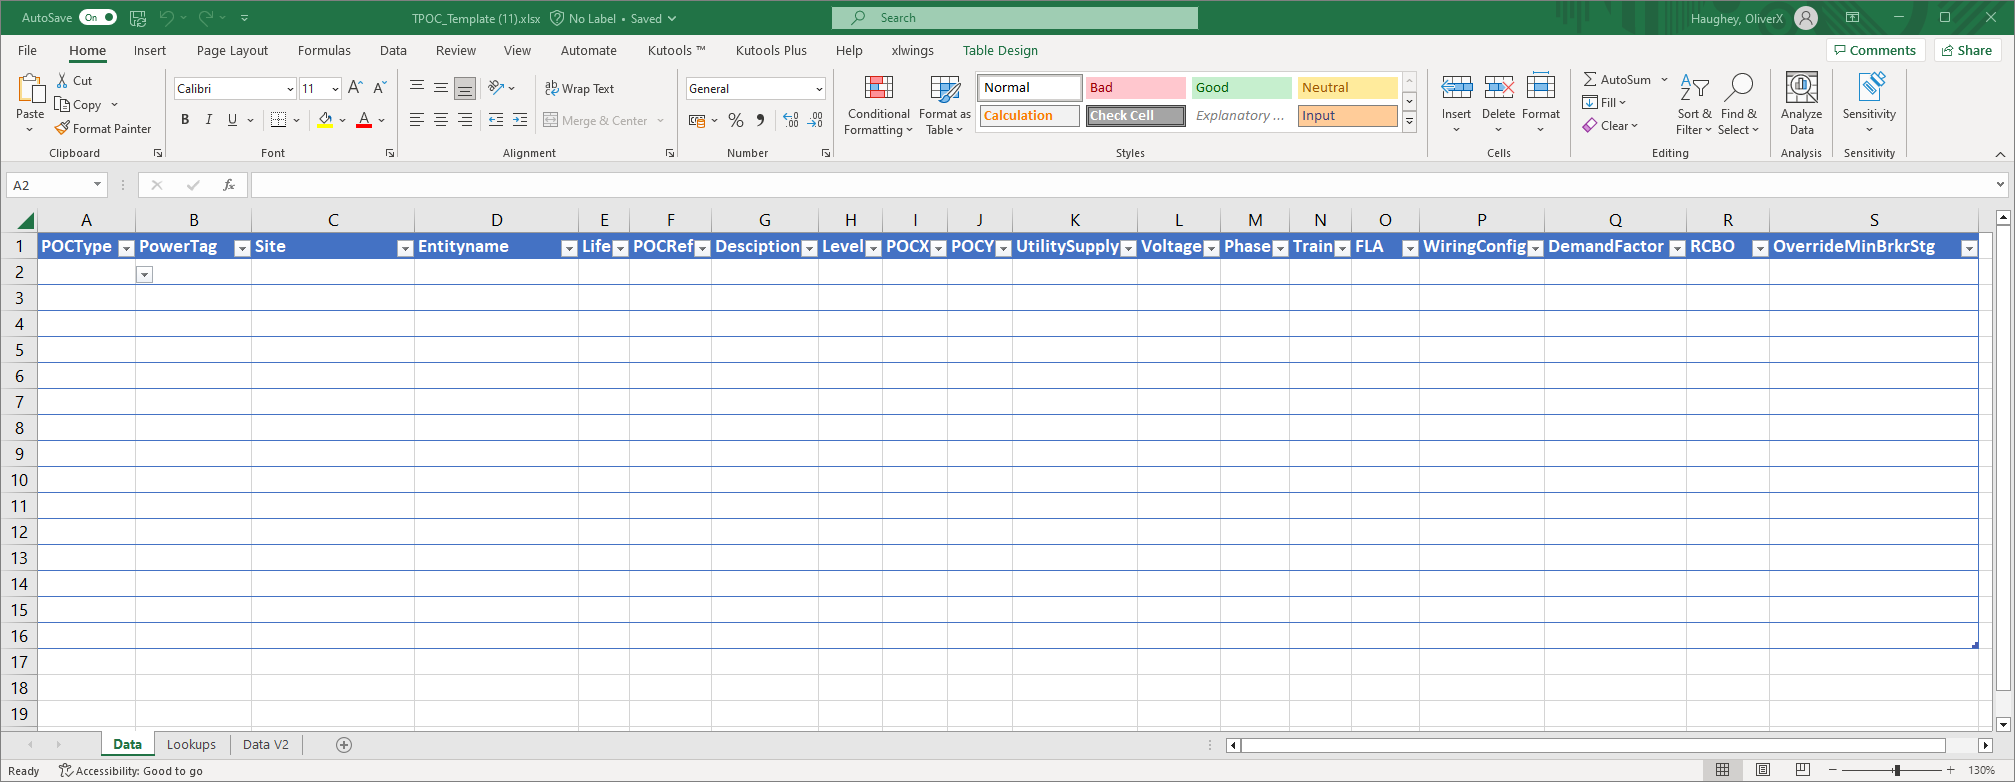
This button enables the user to import multiple POCs onto multiple tools using an Excel template. It also displays the option to download the import template.
The template has fields such as POC type, Power Tag, site, and more as shown in the image below.
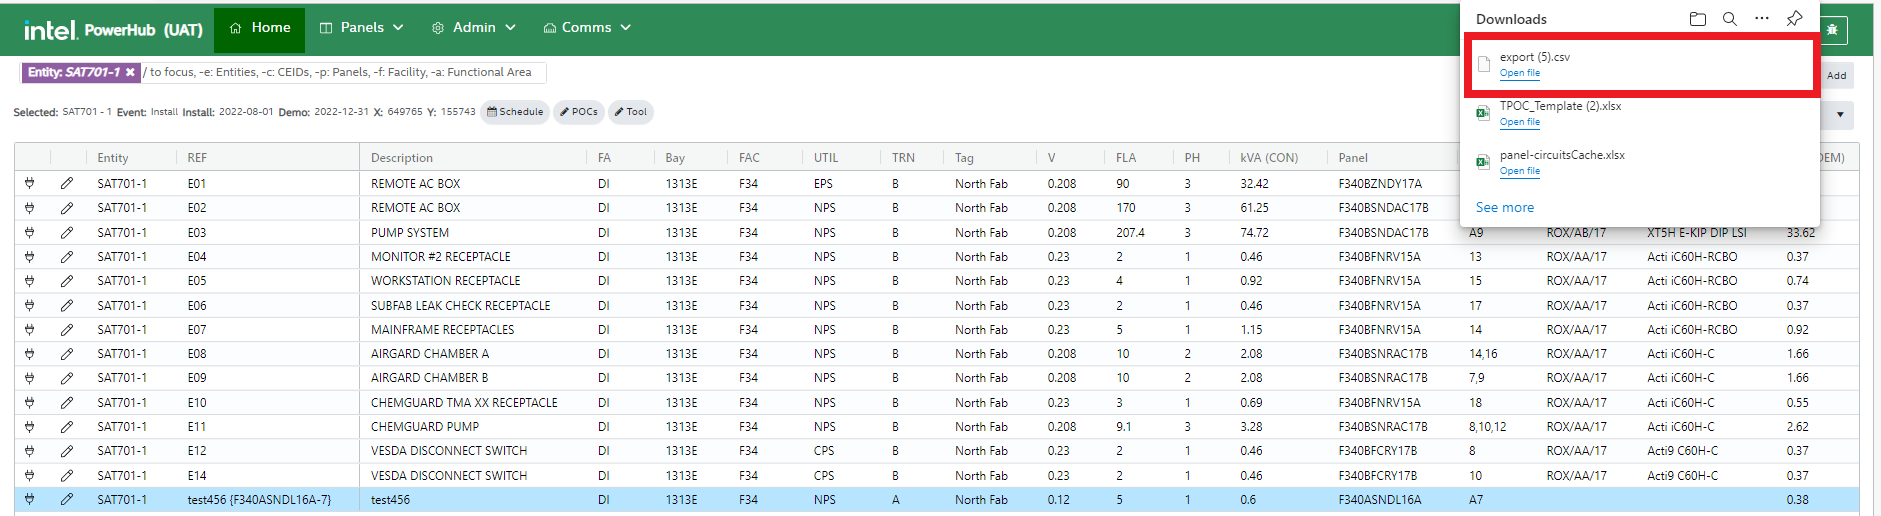
10. Export
This button enables the user to export POC details in CSV format. All of the POCs displayed on the home grid will be exported. Use the search facility to list multiple tools, for example all with a certain CEID or functional area or facility.
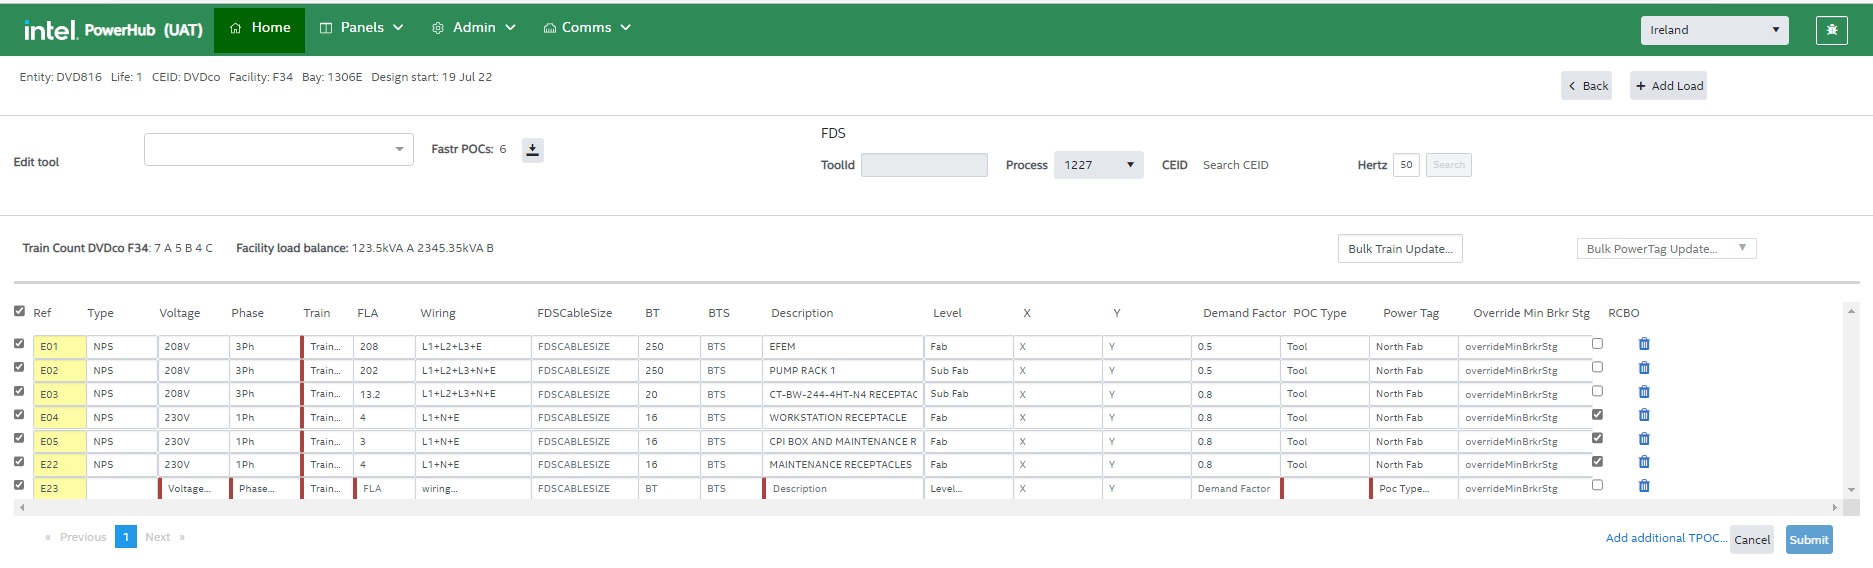
11. Add POCs
This button brings the user to the same page as the “POCs” button described above. Use it when there are no power POCs on a tool. In the Edit tool dropdown search for you tool. Once you select it from the dropdown, you can download POCs from FDS using 2 methods.
-
If the exact tool is built in FaSTr, use the download arrow to add those POCs, or
-
Select the process, CEID and the site’s electrical frequency cand use the “Search” button to download POCs from the reference package, and/or
Use the “Add additional TPOC” button to add more POCs.
Make changes as required and use the “Submit” button to save the POCs to PowerHub.
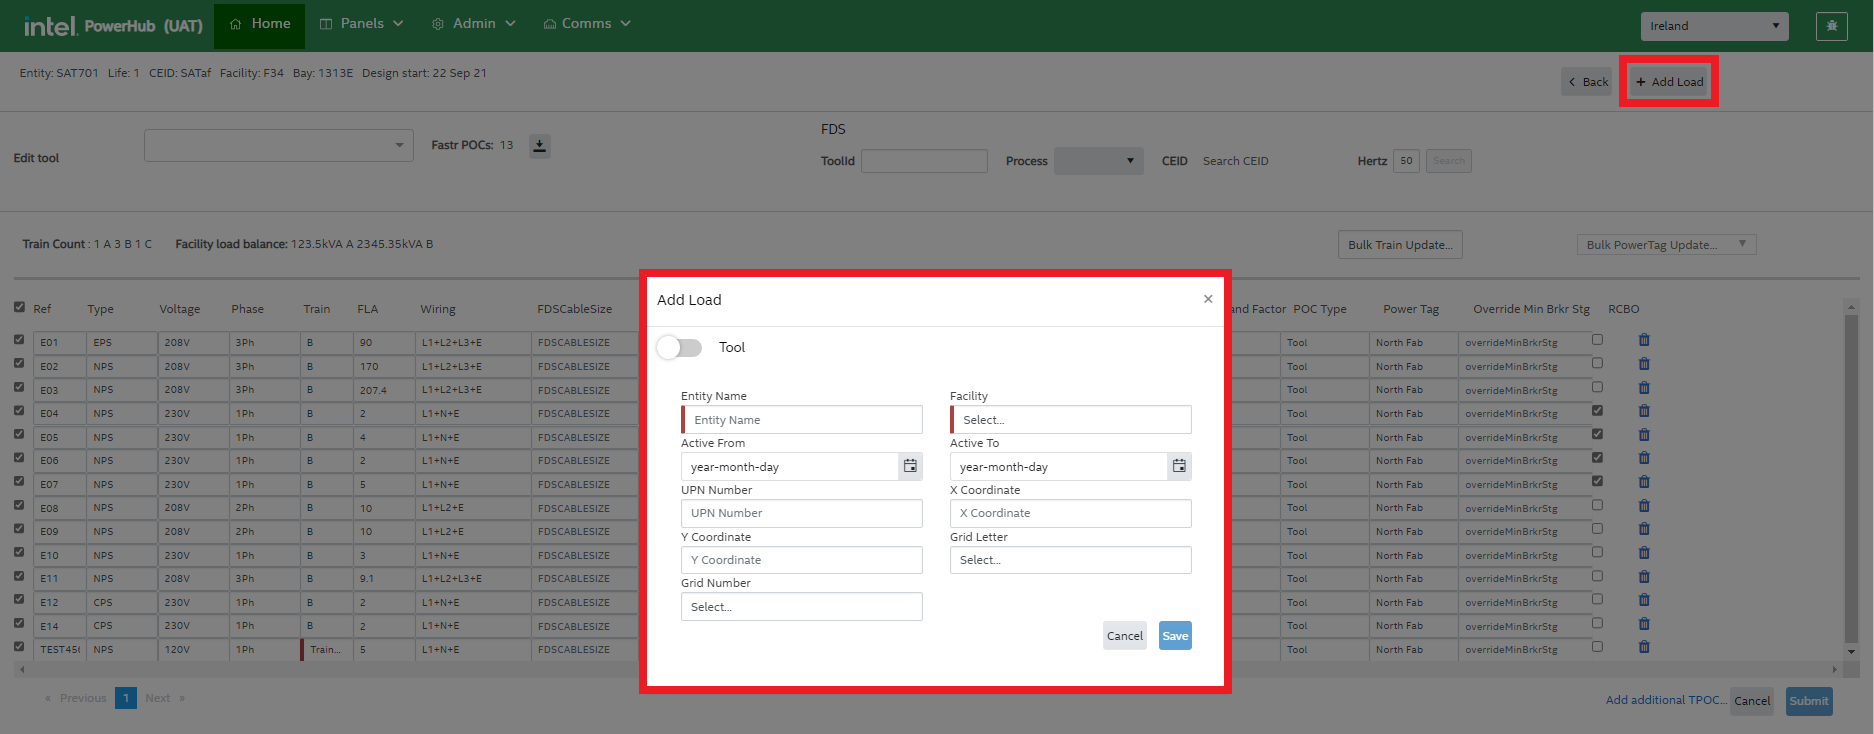
12. Add Tool/Add Load
The ‘Add Tool’ (or ‘Add Load’ button on the POCs page) allows users to add a new tool or non-tool load to the system.
In the Add Load screen the user needs to specify the details such as entity name, life, facility etc. as shown in the image below. While creating a non-tool load, tool life =0.
The Tool Toggle needs to be made active to create a new tool, which displays the following screen.
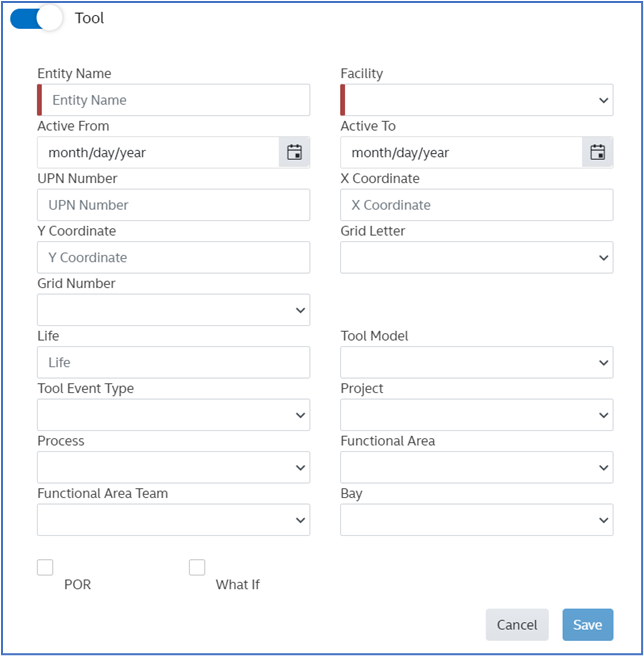
In addition to the fields displayed for load creation, the additional fields displayed for value input are as below:
-
Life (Mandatory)
-
Tool Model
-
Tool Event Type
-
Project
-
Process
-
Functional Area
-
Functional Area Team
-
Bay
-
POR checkbox (check if the tool is in the project schedule)
-
WhatIf Checkbox (used to simulate possible future tools and asses the effect of them on panel resources)